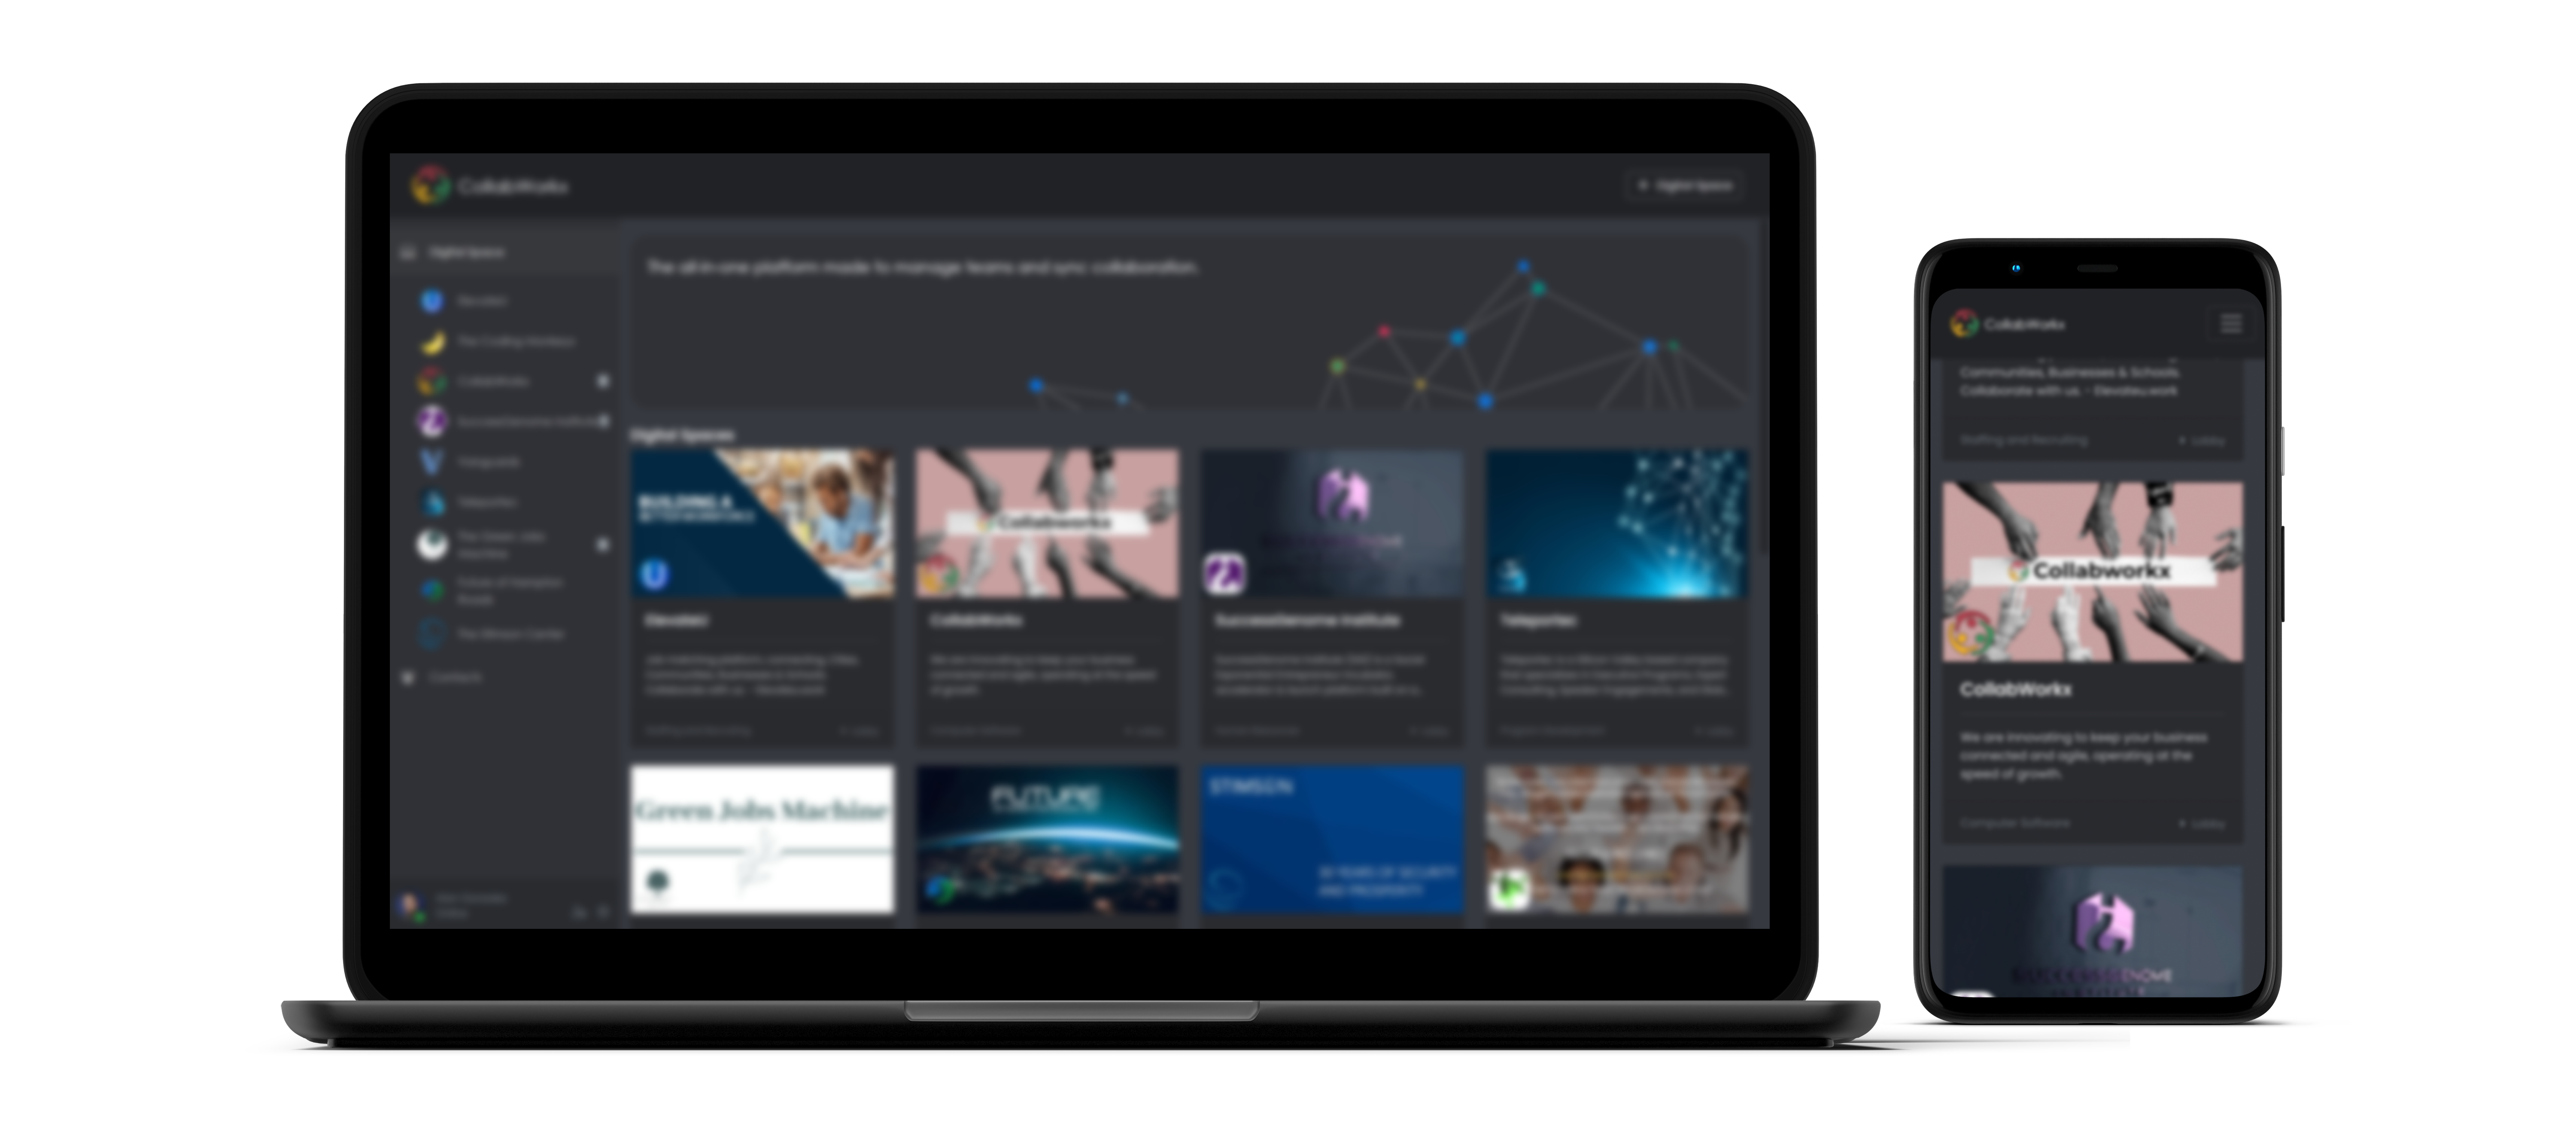
|
Secure Storage User Guide

|
Assuming you are Down Jones, you select "Down Jones"
certificate. Portal is identified by the text in parentheses in
the certificate name. Hence, you are accessing portal "Public"
as Down Jones.
If this is your 1st attempt to access the portal, you will be shown
the following page:
|

|
Enter your data. Please, note two important things:
- The name you enter in the 1st field will be used as your identifier
in Secure Storage
- You can use any name you wish; it is not necessary for the names
in the certificate and in portal to match. Portal uses your e-mail
address as a unique identifier. You cannot change your e-mail
address in portal or in secure storage. If your "real-life"
email address has changed, you will need to re-enroll.
Submit the form. You will obtain the following reply:
|

Use the link to access portal login page. You should get the following:

|
Please, note that portal is not asking for your user ID. This information
is taken from the certificate. You only need to provide your password.
Why do we need the password in addition to the certificate? Well,
certificates can be stolen if you are not protecting them carefully!
Certificate and password is like your credit card and your signature.
Type in your password and hit "Enter". You will get to
your portal home page:
|

|
Back to top
Secure Storage service in the portal
When you accessed the portal, you have been automatically added
to portal's defualt group (in this case, All-members group).
To access Secure Storage, select "Secure Storage" from
portal's "Services" menu and open Secure Storage service
page. I you haven't installed Secure Storage client software yet,
you will be able to do that from this page:
|

| Before we turn to Secure Storage client software, let's visit the
web interface. Click "Browse your storage spaces" to get
the following: |

|
When you register to a portal supporting Secure Storage service,
two storage spaces are created for you: your private space ("Down
Jonses's Private Storage" above) and a shared space for each
group you join in the portal. Initially, only the default group
storage is created ("All-members" storage). We will return
to Web interface later.
Back to top
Client software initialization
It is time now to install and activate Secure Storage client software.
If you haven't done so yet, go to the Secure Storage service home
page and download the client (at present, Secure Storage client
comes bundled with Secure Instant Messanger. Both components are
essential for portal operation). Store downloaded file in a local
directory, execute it, and follow the instructions.
Secure Storage client is an extension of Windows Explorer. It does
not install any program groups. Correctly installed Secure Storage
adds an icon to "My Computer" folder:
|

| When you click Secure Storage icon for the 1st time, you will get
the initialization window: |

| You must create you Secure Storage password (which can be the same
or different from you secure portal password), and you have to select
location for your local secure storage vault (this is a folder that
either does not exist yet or it exists but is empty). You can move
the vault later if you wish. When you click OK, you will see the following
window open for you: |

|
Back to top
Creating local secure storage vault
As you see, Secure Storage interface is just like any other folder,
except for the "Secure Storage" menu. The folder in initially
empty. by right-clicking in the window, you get a menu with two
items: "Create folder" and "Add Portal".
"Create folder" operation allows you to create a folder
on your local machine (inside of the vault) that can be used to
store strongly encrypted files. You can have any number of such
folders. Collectively, these folders are referred to as "local
secure storage area".This is basically a spcae for your most
sensitive information that you want to protect in case your desktop
or laptop are stolen or broken into. Without the password you have
created when you initialized Secure Storage access to these files
is not possible, and a brute force decryption is, for all practical
purposes, out of question. Remember that if you forget your password,
the files in the vault are basically lost. Nobody will be able to
help you with decryption, including us.
After you have created local secure storage area, you can encrypt
the files by simply dragging them from "normal" folders:
|

|
Figure above shows a file in your local storage. Please, note that
in the current release the files CANNOT be open by applications
directly in the vault. The file must be copied to a temporary location,
opened, modified, closed, and copied back the the vault. This applies
to both local and remote folders and is perceived as an additional
security measure.
Back to top
Setting up connection to remote server
To access your remote secure storage you have to add portal to
the client:
|

| This step creates a connection between your vault and the secure
storafe server. You MUST be a member of our secure portal to complete
this step! When you click "Add portal", the following window
appears: |

|
Enter name of the portal you are a member of (in this case "Public"),
your portal name (see above), and your portal password (NOTA BENE:
this is portal password, NOT secure storage password). Finally,
enter the URL to the Secure Storage application server. If you are
using our demonstration portal, the URL is
http[s]://stor.collabworx.com/sss/cam
If you are using your company's or a provider's service, obtain
the URL from your system administrator.
Use of SSL (https) is optional, since all files are strongly encrypted
anyway. If you are truly paranoid, use https transport.
If all items have been correctly defined, after you click OK you
should see the following window:
|

| Clicking on the Public portal icon will result in the following
wondow. As you can see, the two storage areas created in portal ar
shown here: your private remote storage (this is the storage only
you can access; don't confuse it though with yout "local storage":
these folder is in reality on a remote server!), and one group-acessible
storage (All-members). If you create (or get invited to) a new group
in the portal, you will immediately see additional group storage space
here. |

| The private and group storage spaces behave in slightly different
way: you can access your private right away, but to access group storage
you need to take some extra steps. Let us access the private storage
first: |

|
These files have been placed in the remote vault earlier. As you
can see, you can also create folders (to arbitrary depth). Remote
storage behaves the same way as local files system. To put additional
files in the vault, drag and drop or copy and paste, do the same
to copy files back to normal space. All encryption/decryption and
sending/getting files from the remote server will be haqndled for
you transparently! This is the ultimate convenience offered by Secure
Storage design.
Back to top
Web interface versus Windows Explorer interface
We have mentioned above that it is possible to obtain information
about vault contents using browser. This is indeed so. Please, see
below both interfaces in one image:
|

|
Similarly, you can access the group storage. Please, note the following:
- You can only access group storage if you are member of this
group;
- You can be a member of any number of groups in portal; each
group has a separate shared storage space;
- Web interface allows you to quickly check if there is anything
new in the shared space;
- Windows Explorer interface supports full access to files in
the remote storage (see figure below).
|

|
Back to top
Setting up secure shared group storage
If you access to the group storage you will find out that you can
add new folders and delete empty ones, but when you try to place
a file in the shared space, or retrieve it, you will get an error
message:
|

| This means that you don't have the special key that allows you to
encrypt or decrypt files intended for sharing in the group. You must
obtain this "secret" from the portal and import it into
the secure vault to gain access to the shared group files. This is
a very simple procedure, thouigh. First, go back to the portal and
request portal directory: |

| You will see all (and only these) groups to which you belong. If
portal supports Secure Storage service, left to the group name you
will find a small padlock icon. Click it and get this window: |

| Click on the link and save the file to a directory. Next, go to
the Secure Storage folder, enter selected portal folder, and right-click
the group for you wish to access. From the pop-up menu select Select
"Import Group Security Settings": |

|
Select the name of the file you have just downloaded when prompted
(file extension
is .sss).
You will need to provide portal password to import the
file:
|

|
That's it. Your Secure Storage Vault is now fully operational.
If you create or are added to a new group, you will need to repeat
import security group settings procedure for each new group.
Back to top
Transferring Secure Storage settings to another
machine
If you wish to install the Vault on another machine you use (like
you laptop), simply export your security settings using the Secure
Storage menu item and import them to your vault on the 2nd machine.
|

|
This procedure will save you Secure Storage configuration work.
Additional
information about using Secure Storage.
|
|
 |